Archive for the ‘Workshops Photoshop’ Category
October 15, 2009

© 2009 Wazari Wazir

© 2009 Wazari Wazir

© 2009 Wazari Wazir

© 2009 Wazari Wazir

© 2009 Wazari Wazir

© 2009 Wazari Wazir
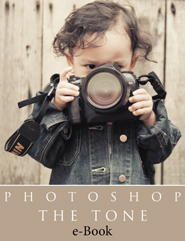
Some people may like it and some people may hate is especially those who are too concern about perfect skin tone. So my e-Book is not for them, my e-Book is for those who have never fear to express themselves. Colors play an important part in our life, some people doesn’t care to pay for a higher price on their cars for a specific colors and design, the car and engine is still the same but they make a big decision on colors. For me personally I’m very particular about colors, like choosing my camera bag, I’ve a Crumpler bag, and I don’t like black so I’ve to wait for a few month to get my colors, something in between Grey and Green.
My point is people can be so choosy about colors. back to my color tone and why I like to play with tone is this, very simple explanation, certain colors really can enhance a mood on a pictures, all pictures, sometimes mute or fade colors picture work great with portrait where there is some kind of emotional feeling into it, for an example a picture of an old man looking through out of a windows, longing for something, this type of a picture will work great without too many colors that will distract a viewer from “the mood”. So either convert those picture onto black and white, sepia or just fade their colors a little bit will do the job, will bring our attention straight to “the mood”, to the “feeling” of loneliness.
We should know when the colors may work and when the colors can become a distraction. For a light heart moment or some kind of a warm feeling I like to add more yellowish or orange tinted colors on my pictures to create more “warmth feeling” onto it. It is not as simple as add more yellow or just bump up the saturation, you won’t get that kind of tones, I’ve try that, so my e-Book will guide you through how to get that kind f tones. I’ll show you the way, the way that most people can understand, as simple as it can be.
Lately there is a trend where people especially here in Malaysia are more aware or starting to pay close attention to the tones, I’ve often get comments something like this, “Nice Tones”. It’s not easy to describe about “Nice Tones” you just absorb it unconsciously. People in United State or from European Country have been using the tones long time enough, from film to digital, I like their tones and it is not because I want to be something like them but I want my picture to have a “feeling”. Normal picture without any color tones into it, is just normal, maybe it is a picture of sadness but without the right combination of colors, the mood wasn’t so strong. For an example a picture of a crying with a bright colorful cloth and a picture of a crying child in black and white will have a different kind of mood, sure enough the picture in a black and white hold much stronger emotional feeling than those in a bright colorful photograph, even though it is same kind of a picture, the feeling is not the same.
Colors can show happiness and colors also can also show sadness. Our life can be so colorful or just monochromatic…
I will update about my e-Book on the next blog update , about the price, few tips and tricks about using it and also how to get it. Stay tune…
Tags:Artistic, Classic, Color, Color Play, Colors, DOF, eBook, Education, Expression, Face, Kuala Lumpur, Learning, Malaysia, People, Photo Outing, Photography, Photoshop, Photoshop Tone, Photoshop Tutorial, Portrait, Portraiture, Portraiture Photography, Retro, Tone, Train, Travel, Traveler, Vintage, Warm, Warm Tone, Warmth, Wazari, Wazari Wazir, Workshops
Posted in Art, Book, Emotion, Expression, Face, Lady Girl Gorgeous, Life, Malaysia, Moment, Photoshop, Portrait, Portraiture, Travel, Workshops Photoshop | 6 Comments »
August 17, 2009

© 2009 Wazari Wazir

© 2009 Wazari Wazir
Sometimes we need to think outside of the box in order to be creative. This things is pretty simple to do, all it takes is a little bit of imagination and just few Photoshop tricks here and there, no I’m not doing the hard work with the Globe, with the help of a “Website” I manage to do this and the key words here is TAGGING, at the meantime, I’ll let you wondering and thinking how I did this because I believe if you can read this that’s mean you have access to the internet and you can get the answer pretty easily. All I did is to add the stars and the lighting effect, the rest is made by the “Mechanism”.
Everybody need a quick answer nowadays, use plug in here, plug in there and use preset and action and later on called it “ART”. It is up to you if you consider whether some work is Art or not, about my picture about, it is not art, just pure playing with my pictures but the “Art” comes into play when we think outside of the box and put outside elements to make this things a little bit more interesting. I got the “Stars” from Google Earth. A lot of younger generation nowadays are too lazy to read after they graduate thinking that they have known everything in the university, how wrong they are. I’m saying this as my personal experience and just my personal thought. You may have your own, I mean by not reading is, not reading education material, not something like love novel that most people read, I mean a lot of younger generation nowadays read less education material, just few of them do.
How many people buy and read photography books other than magazine, maybe some of you say that photography books is expensive, how about your camera? I think your DSLR is so much expensive isn’t it. Buying expensive camera equipment without the knowledge of handling them and use them the way it should be is a waste of money, just remember, people can steal your equipment but not your skills and knowledge. My point is spent some extra money on education, buy some books about photography or anything that might interest you. Learn from other experience photographer. We cannot meet all the great photographers out there face to face but we can “Listen” to their story and experience through their books.
In photography we need to practice and practice in order for us to improve our skills but if we keep on pressing our shutter blindlessly without any clear vision, we are not making any photograph but just taking picture. If the photographers who have some knowledge in his head, he will be able to focus more clearly, see the vision ahead of him even before he lift the camera to his eyes. I’ve met many great local photojournalist who have a clear picture about a picture that they need to shoot even before they get out of the office, by the time they get their assignment from their Boss, they have a “Clear Vision” about how they are going to Photograph The Assignment.
Tags:Anak, Anak Lelaki, Art, Artistic, Asean, Asia, Bokeh, Boy, Classic, Emotion, Expression, Face, HaiQal, Kuala Lumpur, Malaysia, My Son, Photo Outing, Portrait, Portraiture, Son, Vintage, Wajah, Wazari, Wazari Wazir
Posted in Art, Emotion, Expression, Face, Malaysia, Portrait, Portraiture, Workshops Photoshop | 2 Comments »
August 16, 2009

© 2009 Wazari Wazir

© 2009 Wazari Wazir
This is my second Portraiture and Photoshop Workshops held inside University campus, my first Workshops in the University is at International Islamic University Malaysia Gombak, thanks to Mastermind the person who responsible for inviting me to conduct the workshops. This time the workshops taking place in the University Kuala Lumpur Malaysian Institute of Aviation Technology at Dengkil Selangor. A million Thanks to Mr Faizal Sharif, Lecturer and advisor for Click and Snap Club of UNIKL for inviting me to do a workshops there for his student.
It is an honor for me to share my experience with a group of talented young people there. There were more than thirty student participating in my workshops. Thanks again to Mr Faizal Sharif introducing me to his student, actually I did not have to introduce myself further to the student before I start the workshops because Mr Faizal already introduce myself perfectly. Actually I wasn’t good at public speaking and for me to speak in front of large group of people make me a little bit nervous but after few minutes getting to know some of them, I can get into the mood and thanks again to Mr Faizal for assisting me.
We start our workshop with a brief explanation abut how to get a good portrait and I tell them, the best way is to keep it simple, in portrait, the most important thing is the person so please do try to avoid any unwanted distraction in the background unless you are doing some environmental portraiture which you need to get the background also in order to complete the story, to complement the portrait so people who see your picture will know a bit about the person we photograph, like for an example in the photo above, we can call that an environmental portraiture, the person in the picture have something to do with the plane, he is a student of an Aviation technology, people can relate the portrait and the background.
Some portrait we can arrange and some of them we can’t and when that thing happen we need to position ourself in order to get a good picture of that person, usually this kind of thing happen in photojournalism. The other thing that we need to pay attention is the light, where the light is coming, I’m talking about natural light here, if we use flash, than it is different story but still you need to know how to play with the flash otherwise your picture will look flat. After less than an hour of explanation about how to get a good portrait shot we have some light snack and after that, portraiture session in the hangar with the plane.
The hangar was so big and there were few aircraft there and among them is a Skyhawk, our time was very limited simply because we want to concentrate more on editing and with only just one hour to shoot is not enough because there were too many participants but I hope they get the idea and will continue shooting on their own at their own free time. The light from outside shining through the hangar was quite bright so we do not need a flash for our photo shoot, just natural light as our light source. Actually I do have a lot of ideas for the photo shoot but because of time constraint I hope we can have another opportunity to shoot there once again.
After we got a couple of shot we get back to the hall, a big hall actually to do our editing, I was told by Mr Faizal that most of the student already have some basic about using Photoshop so he told me not to focus too much on basic tools. I start my editing process in RAW, like the way I always does, and I know most of them have never shot RAW or maybe this is the first time they heard about it and some of them have never open a “Bridge” before, “Bridge” has many useful feature actually beside acting like a browser it can also do some batch processing, renaming files, add metadata and keywords to our photos and it make our job a little bit easier in term of navigating our photos for editing. I wish I’ve more times explaining a little bit about “Bridge”.
Back to he editing, I told the student that ACR or Adobe Camera RAW is something just like Adobe Lightroom but it has less feature compared to Lightroombut still for simple basic editing, Lightroom will do unless we want to do some heavy processing with multiple layers than we need Photoshop. After ACR, I just across to Photoshop telling them how to boost color saturation using “Adjustment Layers”. We can do the editing directly to the layers itself but by using “Adjustment Layers” we have more flexibility in term of manipulating them, “Adjustment Layers” for me is “Non Destructive” editing, we can always go back and forth to our editing by using “Layer mask” that automatically created if we choose to use “Adjustment Layers”.
I spent more time with them explaining the important of “Masking” and it is The Key to many possibilities. If we can Master the “Layer Mask” our job will become easier and we can be more creative with our editing. Basically “Masking” is the concept of hiding something that we don’t want to get affected by adjustment that we make, for an example let’s say we have two layers, on the bottom one is colors pictures and on the second or top layers is the same picture but we turn it into Black and White. So we have two layers, one with color and the other one is in Black and White, by putting a “Masking” on the Black and White layer with a “Black Mask” we hide the Back and White and we can only see the color picture below but is we paint the “Black Mask” with a white color using brush, it will reveal some part of the Black and White itself, if we just painted a small part of it. Basically that’s it, the rest we need to open our mind and keep on exploring and think outside of the box. For me alone it took more than few month to really grasp what The Masking and Layer Mask is.
I hope all the student can explore on their own and about the editing just like photography you need Passion in order to excel. Each and everyday there will be newcomer in the photography arena, we need to get extra knowledge and skills to be different but not for the sake of being different but for personal satisfaction, at least you know that you have something that nobody have and be proud with our artwork.
To all the participant and student of UNIKL MIAT, I wish you all the best with your studies and even though Photography is just a hobby to some of you, try to make it interesting and be proud of your work. To Mr Faizal, A million thanks to you for giving me the opportunity to conduct a small workshops for the Club and thank you also for picking me up from Putrajaya and back to Putrajaya again even though it was a little bit longer on our journey back to Putrajaya, at least we can share some thought during the ride. Once again I wish all the best to You Mr Faizal, your Photography Club and student of UNIKL Malaysian Institute of Aviation Technology, I know you all can really Flying High…
Tags:Art, Artistic, Asean, Aviation, Fighter Jet, Kuala Lumpur, Malaysia Aviation, MIAT, People, Photo Outing, Portrait, Portraiture, Portraiture Photography, Skyhawk, UNIKL, University Kuala Lumpur, Vintage, Wazari, Wazari Wazir, Workshops
Posted in Art, Expression, Malaysia, Portrait, Portraiture, Portraiture Workshops, Workshops Photoshop | 2 Comments »
August 12, 2009

© 2009 Wazari Wazir
Enough rant about my experience while attending “Compulsory Adobe Photoshop Course” organize by my department, that’s what you get when you attend a course for free, you are not given a choice, just live with it, but I’m sad because it is tax payers money, the course suppose to make our job easier, faster and more efficient with the knowledge that we gain but if we can’t use the knowledge on our day to day duty, what’s the point of the course?
Back to the picture of my son HaiQal above, in case you were to ask, how do I get the colors. As usual I develop my picture in ACR Adobe Camera RAW simply because I shoot in RAW, I boost the temperature somewhere between 7000 to 8000K, I know it is high temperature but later on I decrease the Vibrance and just push a little bit saturation, all done in ACR. After finishing some basic editing in ACR, later on I do my final adjustment in photoshop, this time I play around with Channel, I just give you some hints only, how to play with Channel, go and figure it out, that’s the only way to learn, you may make some mistake or get some unwanted result but you will learn along the way. Don’t be afraid to make some mistake and don’t be afraid to try something new.
I like to keep on experimenting, I don’t use any plug-ins, preset or any photoshop action, I did everything from scratch but I do suggest to any of you out there who make bulk editing like wedding for example to use plug-ins, it will increase your productivity and will save you great times, but to get creative and if you have more times to play around and nobody waiting for your art work then you can get creative with photoshop, trust me the excitement of doing the things on your own rather than using plug-ins is different because you know what you are doing rather than let the “Software” do the thinking. Taking a picture yourself is not the same as giving order to other photographers to get the picture. Same like if you pay someone to get a picture on the other part of the world, yes you get the picture but you don’t get the experience of being there. But sometimes we need to work smart rather than work hard, you be your own judge and you draw your own line…
Tags:Anak, Anak Lelaki, Art, Artistic, Asean, Asia, Bokeh, Boy, Classic, Colors, DOF, Emotion, Expression, Face, Malaysia, My Son, People, Photo Shooting, Photography, Portrait, Portraiture, Portraiture Photography, Retro, Son, Vintage, Wajah, Wazari, Wazari Wazir
Posted in Art, Emotion, Expression, Face, Family, Life, Love, People, Portrait, Portraiture, Portraiture Workshops, Workshops Photoshop | 2 Comments »
August 4, 2009

Portraiture Workshops

Portraiture Workshops

Portraiture Workshops

Portraiture Workshops

Portraiture Workshops
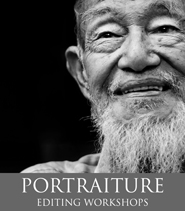
This is my first Portraiture Photoshop Workshops in Kota Kinabalu Sabah, a million thanks to my friend Roslee Karim for organizing this workshops under his company Spylens Studio. I was at Kota Kinabalu two days before the workshops just to make sure everything was in working order, making final preparation in Spylens Studio where the editing class will taken place. This is also the first time my photoshop editing class taking place in the studio, previous workshops was in the hotel seminar room and not to mention my “Mini Workshops” taking place in “Coffee Shop” all over Kuala Lumpur.
We start our workshops with get to know session and I’m a bit surprise to know that almost all of them come from”Educational Background”, teachers, lecturers and also those who involve in “Education Environment”. Our photo shoot was a bit late, the sun is high already but we did make the most of the times and the lighting available, yes we just play with natural light, no reflector and no flash. I did not get the best shot but I do believe that most of my student get the best angle and the best expression from the model, I don’t want to make this photo shoot personal, so I just let my participants enjoy their time with the model.
After we have our light snack and tea break, it’s where the fun start, the editing, we head to Spylens Studio to do our editing. Some people just could not wait to edit their picture, this is not photojournalist workshops where minimal editing is all we need but this is “Artistic Editing”, where we enhance our picture just for pure enjoyment and satisfaction, I came from photojournalist background so I do know where to draw the line when it come to editing “Photojournalist Picture” but when it come to personal stuff, for me and for my opinion, the sky is not the limit, we are only limited by our own imagination.
The first thing that I really stress to all the participant is, we must get a great short for a start, Photoshop is not a tools to fix a bad picture but it is a tool for enhancement. To enhance our picture to make it even better and more presentable, even in those “Darkroom Days” they do the editing in the dark, dodging and burning here and there, to get great contrast and tone between dark area, grey and totally white area. If the picture was printed without any dodging and burning, the picture will look flat, lifeless, even though the picture is great on it’s own, it still need few “editing” in the darkroom to make it more presentable.
To all the participants, thank you very much for your support. Feel free to expand the ideas and the method that you have just learn, let the juice of creativity flow freely.
Tags:Borneo, Classic, Classroom, Kota Kinabalu, Malaysia, Model, Model Shoting, Outing, People, Photo Shoot, Portrait, Portraiture, Portraiture Workshops, Sabah, Spylens Studio, Tutorial, Vintage, Wazari, Wazari Wazir, Workshops
Posted in Art, Assignment, People, Portrait, Portraiture, Portraiture Workshops, Workshops Photoshop | 5 Comments »
June 25, 2009

Portraiture Workshops | Kota Kinabalu

Portraiture Workshops

© 2009 Wazari Wazir

© 2009 Wazari Wazir
PORTRAITURE EDITING WORKSHOPS | 1st August 209 | The Schedule
- Ada Dua Sesi | Photo Shooting besama model ( Poster Atas Sekali ) | Shooting sebelah pagi | 3-4 jam.
- Sesi Kedua Editing | Selepas makan tengahari sehingga malam | Bukan Tengah Malam 🙂
Mengenai Editing :
- Semua peserta dikehendaki mempunyai asas penggunaan Photoshop, sekurang-kurangnya pernah menggunakan perisian photoshop, sebulan, setahun atau mungkin lebih tapi merasakan masih lagi belum mahir dengan penggunaannya ataupun kurang berpuas hati dengan pengetahuan sedia ada.
- Untuk makluman semua, saya tidak akan mengajar cara penggunaan Preset, Actions ataupun Plug in, semua editing saya adalah from “Scratch”. Hasil kerja saya yang saudara serta saudari boleh lihat di sini atau di Flickr saya adalah sepenuhnya menggunakan Photoshop sahaja tanpa menggunakan Preset, Action ataupun Plug In, tetapi saya mencadangkan kepada rakan-rakan yang melakukan photography secara commercial untuk menggunakan Actions ataupun Plug In, kerana ianya memudahkan serta mempercepatkan kerja.
- Saya tidak akan mengajar Asas Photoshop, jadi saya tidak akan menghabiskan masa untuk menerangkan satu-satu mengenai “Tools” yang ada di Photoshop serta kegunaannya.
- Apa yang akan dipelajari nanti adalah lebih kepada “Menaik Tarafkan” hasil gambar kita ataupun Image Enhancement serta diberi sentuhan Artistik.
- Antara lain kita akan mempelajari bagaimana untuk menggunakan cahaya semula jadi untuk Portrait serta pemilihan lokasi yang baik untuk model shooting, saudara dan saudari tidak memerlukan Flash untuk sesi Portraiture saya kerana kita hanya akan menggunakan Natural Light.
- Berkenaan dengan editing pula, sila bawa Laptop masing-masing kerana komputer tidak akan disediakan. Lokasi Editing adalah di Spy Lens Studio milik Roslee Karim.
- Portraiture Editing | Kita akan mempelajari workflow saya, dari Basic Enhancement sehingga Artistic Enhancement.
- Kita akan belajar mengenai Penggunaan Layer Mask, penekanan akan diberikan kepada Layer Mask kerana pelajaran seterusnya amat berkaitan dengan pemahaman yang kuat mengenai Layer Mask.
- Eyes Enhancement | Bagaimana untuk mendapatkan ataupun menaiktarafkan “Catch Light” pada mata.
- Black and White | Bagaimana untuk menghasilkan Black and White yang mempunyai tone menarik.
- Tone Color | Bagaimana untuk bermain dengan Tone Warna untuk memberikan gambar kita lebih impak serta menambahkan mood pada gambar, Vintage or Retro feeling into it.
- TEXTURE | Kita akan belajar mengenai penggunaan Texture pada gambar secara berkesan, saya akan berikan Texture yang biasa saya gunakan kepada semua para peserta secara percuma.
- Nota | Semua peserta akan diberikan Nota PDF, namun demikian bukan semua yang dipelajari ada di dalam nota tersebut, semua peserta harus membawa buku nota masing-masing untuk mencatat maklumat serta tips-tips yang penting.
- Secara kesimpulannya, I will teach you how to achieve what you see at my flickr and with a little bit adjustment here and there, hopefully you will find your own way or your own style.
Pendaftaran | Pertanyaan | Booking :
- Hubungi Roslee Karim di Nombor 016 8317174 | Email : rosleekarim@gmail.com
- Workshops Fee : RM400.00
- Boleh bayar kepada : Spylens Photography – Public Bank : Account No : – 3 9 8 6 1 3 6 5 2 4 | Emailkan slip bayaran kepada rosleekarim@gmail.com
- Deposit RM100 atau lebih boleh bayar kepada Roslee dan baki selebihnya pada hari Workshops.
- Sekiranya masih mempunyai sebarang pertanyaan boleh hubungi Roslee di Facebook Roslee Karim atau boleh juga gunakan ruangan comment di sini.
Tags:Adobe Photoshop, Art of Editing, Artistic, Borneo, Editing, HaiQal, Kota Kinabalu, Malaysia, Model, My Son, Portrait, Portraiture, Portraiture Editing, Portraiture Workshops, Portraiture Workshops at Kota Kinabau, Sabah, Wazari, Wazari Wazir, Workshops
Posted in Art, Emotion, Expression, Face, Malaysia, Portrait, Portraiture, Portraiture Workshops, Workshops Photoshop | 9 Comments »
June 22, 2009

© 2009 Wazari Wazir

© 2009 Wazari Wazir
Tags:Art, Artistic, Classic, Collage, Creative, Creativity, Cry, Editing, Frame, HaiQal, Kuala Lumpur, Malaysia, Marco Polo, Mini Workshops, Moment, Montage, Photo Editing, Photography, Photography Workshop, Photoshop, Photoshop Workshops, Picture, Portrait, Portraiture, Retro, Vintage, Wazari, Wazari Wazir
Posted in Art, Expression, Face, Hitam Putih, Malaya, Photoshop, Portrait, Portraiture, Workshops Photoshop | 5 Comments »